The God Killer Sword, a Themiscryan treasure wielded by
Diana in the Wonder Woman movie, was the obvious choice of weapons to accompany
the origins based shield I designed. I
recommend making the sword in conjunction with the shield, as some of the supplies
are shared between the two.
The sword is lightweight and designed to be sturdy with a
forgiving exterior, as I hope to take it to my first Comicon. From what I've read online, some of them
frown upon hard prop weapons. The core
of the sword is made of dowel rods and foamboard and the outside is made of
foam, newspaper, and paper mache. You
could modify this build by eliminating some of the many layers I used for
additional reinforcement and to soften the exterior.
Supplies for the core: Foamboard, 1" dowel rod, and 3/8"
dowel rod. (I did not use additional
piece of wood in photograph.)
Tools and other supplies used: Handsaw, vice, power drill
with assorted bits, box cutter, pocketknife, knife sharpener, file, scrap wood (piece of
old 2"x4"), marker, glue gun, scissors, ruler, Elmer's Glue All,
paper mache, straight edge, sand paper, leather cord, bowl for mixing
Additional supplies: gloves, spray foam, newspaper, masking
tape
Finishing: Acrylic paint- black, thalo silver, and thalo
gold (same shades I have used for all the other pieces of the costume);
paintbrushes; protective spray
Part I shows how to create the core of the sword, which is made of
dowel rods and foamboard. The basic
design of the hilt is shown in the sketch below.
I cut a 6.5" piece of 1" dowel rod and drilled a deep
hole in the middle of one side until it was just big enough to squeeze the
3/8" dowel rod inside. I recommend
starting out with a small drill bit and slowly working your way up with
additional bits until you reach the 3/8" size if you are using a hand
drill. I also drilled a shallow
3/8" hole in the middle of the other end.
Using my pocketknife and a file, I created a flat
indentation on opposite sides of the 1" rod to later accommodate the foam
dragons.
I next cut the 3/8" dowel rod into a piece
approximately 27" to 28" and firmly wedged it into the larger rod.
For the end of the hilt, I cut a piece of scrap wood as
shown below with my hand saw.
There are probably other kinds of saws that are more
efficient, but I haven't learned how to use any of those yet. This was a little crude, but got the job
done.
Once I had the shape cut out, I whittled it down with my
pocketknife.
Next, I sanded it and drilled a shallow 3/8" hole in
the end.
I cut a small piece of the 3/8" dowel rod and used it to
connect the two pieces of wood, as shown below.
I temporarily removed the 28" piece of dowel rod to sand
it down and create flat edges on two opposite sides.
Next, I cut out two pieces of foam board (approximately
23.5" long) using the box cutter and glued them to the rounded edges
of the dowel rod using a glue gun, as shown below. The flat edges face up and down (you want a flat blade.) You may need to trim the edge of the dowel
rod if it is too long at the end.
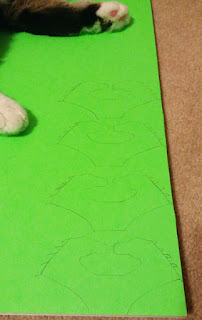
I used the sketch of the hilt shown earlier in this post as a pattern for the dragons
and traced it onto the foam board, cutting out multiple dragon pieces. (Excuse the cat feet, Annie wanted to
help!) Don't waste your time cutting out
the ridges on the outside like I did; I ended up covering them later anyway.
I used a whole
dragon piece on the front and back of the sword hilt and cut smaller pieces to fill in the
middle. You can see an example of how I layered the pieces below. The gap in the middle will be filled with the 1" dowel rod.
I attached the dragon pieces to the sword core using the glue gun.
This concludes the basic core construction. Part II will show how to create the exterior of the sword and finish it in acrylic.


No comments:
Post a Comment