Wonder Woman is now out in theaters and my Wonder Woman
skirt is making its debut this weekend as well! This skirt is a bit longer than the movie version; I've tailored it more to my own
body type while still trying to maintain the essence of the original costume since I'm no Gal Gadot.

In Part I, I sewed an underskirt which serves as the foundation for the final product. You will need the completed underskirt before you can move on to Part II, which involves the assembly of the leather gladiator style design.

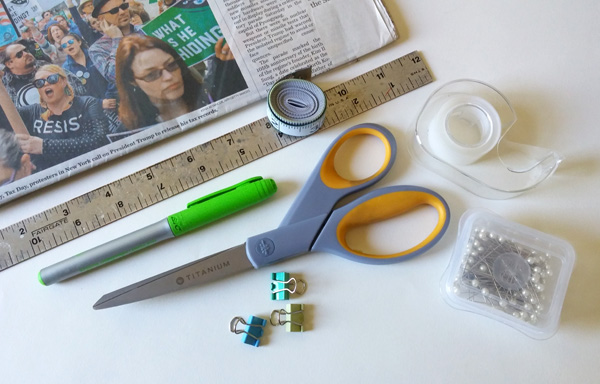
General materials needed for Part II include: Newspaper, scissors, scotch tape, straight
pins, small clips, ruler, permanent marker, and measuring tape.
You will also need leather that can be cut into large strips for
constructing the skirt- the leather should be a medium thickness (flexible yet
heavy.) The original costume has some
texture to the skirt so I chose leather with a similar finish. I found two bags of remnants that worked well for this project-
this particular brand includes consistently sized large pieces, unlike other
brands I've seen with smaller and more varied scraps.

For the stitching, I used artificial sinew and an awl. This brand of sinew actually splits easily
into half, as shown below, and I used the half-thickness strands for sewing.

Additional materials used include acrylic paint (blue, thalo silver,
and black), paintbrushes, charcoal pencil for marking on the leather, sew on Velcro, needles,
and thread.

For coating the painted leather surface, I used an acrylic finisher and repellent.

I also recommend that you have some short shorts, etc. that you plan to wear under the skirt available during construction to help you choose the length of the material. I made the mistake of not doing this and had to go back and make some adjustments later. I found that these tiny Sport Kilt shorts work well for superheroes as well as women in kilts.

I also recommend that you have some short shorts, etc. that you plan to wear under the skirt available during construction to help you choose the length of the material. I made the mistake of not doing this and had to go back and make some adjustments later. I found that these tiny Sport Kilt shorts work well for superheroes as well as women in kilts.
The first step is to create a basic pattern for your leather
pieces using newspaper. Obviously, the
exact size and shape will depend on your measurements, but further down you can
see the shapes and sizes of the pieces I assembled. Don't forget to calculate plenty of room for
overlap of the pieces.

You will see a dress form used several times in this blog but I do NOT recommend using one for assembling the skirt. I bought it for a future project and it just happens to be useful in the photographs. However, I found that it varies greatly from my lower body measurements and would be a bad choice to use in constructing the skirt. Instead, I tried on the underskirt in front of the mirror and pinned on my pattern pieces so I could see how they fit on my own body. I sketched and cut out the newspaper pieces and pinned them onto the underskirt and then made changes accordingly. It's better to make the pieces too big to start with, as it is easier to cut paper off then to add more on.
The basic gladiator pattern includes:
- Three strips for the front

- Three longer strips for the back (again, actual length will vary based on your measurements, but generally you are going to need more material in the back.) As you can see below, George strolled over to help me with my design.

- Three strips each for the right and left sides of the skirt (six total- you will have two identical copies of each piece below)


- Two strips to go underneath where everything overlaps on both both the front and back (four total.) I had to change my size and shape for these pieces a few times throughout the process. I recommend waiting until the rest of the skirt is assembled before creating the pattern for these pieces.

I also highly recommend labeling the pieces on the pattern so you
don't mix anything up. Once I was
satisfied with my basic pattern on newspaper, I traced it onto the leather and
cut it out. I used tiny stickers on the
back of the leather strips to label them as well. It
would be best if all the material was the same color, or at least fairly dark. Since I was at the mercy of the sizes and
colors in the remnant bags, I ended up having to do the four upper side pieces in a lighter
color than the rest of the skirt. Basically, you want any pieces in which the back side might be exposed when moving to be fairly uniform.

Once your pieces are cut out, the next step is to clip and
sew them to the underskirt. Use the
mirror and your own body to ensure a custom fit. The underskirt is meant to be worn with the
button on the right hand side, not the center.
I started with the front three pieces of leather and
positioned all three pieces exactly how I wanted them. Then I clipped only the bottom two pieces to the
underskirt and stitched them to the fabric using artificial sinew and a sewing
awl. I used a lockstitch, which I
discovered last fall in this Tandy Leather tutorial.
Notice that the stitching is positioned only in areas where the other
pieces of leather will overlap. You
don't want the stitching to show in the final piece.

Next, I added the middle piece of leather and stitched all
three pieces along very the top of the skirt.
The stitching at the top will later be covered by the Wonder Woman belt,
so it will not be visible on the final costume.

I repeated the process for the three strips on the back of
the skirt and on the sides, again positioning the pieces in front of the mirror
and clipping them on to ensure the skirt is as symmetrical as possible. I did not assemble them using the dress form.

At this point, I painted all the pieces stitched on thus
far a dark metallic blue, using a combination of blue, the thalo silver I used
for the bracelets, and black paint. It took
several coats to get an even look. You
may want to mix large quantities of paint in a resealable container to keep the
color consistent for the whole skirt.

Next, I arranged and stitched the two side pieces on the
left and right. Obviously, I stitched the bottom piece first. Although I stitched all the way to the end of the strip on
the back, I left a couple inches free in the front. You will see why shortly.

I stitched the top piece next and left even more unstitched
space in the front, as shown below.

Here is the reason for the extra space at the front: My construction design allows for both the left and right
side to attach with Velcro on the front, as shown on the final piece below.
This allows the button that fastens the skirt to be hidden and also
allows for additional adjustment to the skirt as needed to ensure the best fit possible. Some days, non-demigoddesses just need a little extra room.

I stitched the soft piece of the Velcro to the back of each
side piece using needle and thread as shown below and the rougher side directly
onto the underskirt and leather.

Here is the front of the skirt with the side pieces
added. Before proceeding further, I
painted the side pieces blue as well.

Lastly, I stitched the two under pieces in the front and
back and painted them blue. This is
where you need to try your short shorts on before you stitch! I wasn't planning on adding more depth to this
skirt, as it is already three dimensional, but it looked flat, especially
compared to the accessories I have already created. I used a lighter blue/more silver shade of
paint around the edges of each section to really make it pop and then added the
quintessential silver stripes and battle damage as well.

To give the skirt extra protection, I coated it with an
acrylic finisher and repellent.
This is the final product!
It is a wrap around skirt with a single button to fasten, as shown.

Once buttoned, the side Velcros to the front
for a seamless appearance.

On the inside, the hidden pocket from Part I comfortably holds an ID,
credit card, or cash.

This is the view from the back.

And a side view.

Here you can see the actual fit of the skirt. Remember, the stitching at the top will be
later hidden with the gold Wonder Woman belt.

Wow, you did an incredible job! Thank you for posting the tutorial! How did you paint the skirt? With a brush? I'm guessing so but wanted to confirm. Thank you!
ReplyDeleteThank you! Yes, I used brushes to paint the skirt.
DeleteGreat tutorial! About how wide did you make each leather strip? Would you say 4"?
ReplyDeleteYes, most are between 3.5 to 4 inches. The back middle strip is closer to 5 inches and the two side middle strips are around 6 inches.
DeleteAmazing! What kind of machine did you use? I have a somewhat older Kenmore, kind of a medium duty machine, it'll go through a couple layers of denim with a sharp needle. Would I need to find a heavier duty leather sewing machine? Your skirt looks wonderful!
ReplyDeleteI actually used a sewing awl and artificial sinew to stitch through the leather instead of a machine. It was inexpensive (link to a tutorial of how to use one is above in my post.) I used a Laura Ashley Brother for the cloth underskirt. Thanks!
DeleteHello everyone, I am going to buy Mini skirts/kilts for and found Mini Kilt they are offering made to measure/custom made kilts.. Have anyone of you bought anything from these people.. are they legitimate .? their prices are very reasonable, can anyone guide me???. Should I buy from Scottish Kilt .????
ReplyDeleteI am not familiar with either of those companies. I have purchased from Sport Kilt in the past- their designs tend to be a little sporty/less formal than some brands with their yellow logo and Velcro fastening incorporated into the design.
Deletethanks for sharing the information of kilt,,,,becoz i also like the kilt....
Deletehigh fashion kilts for men
Thanks For Share Awesome Custom Designed skirt
ReplyDeleteT Shirt Online
Things changed, and knitters bought branded yarns that were chemically dyed, of regular though unremarkable quality and were the same the world over. Villapaketti
ReplyDelete